Showing posts with label dolce. Show all posts

11 August 2015

Apricot Budino Dream


I'm late. I'm late.
For a very important date!
No time to say "hello" good bye.
I'm late.
I'm late.
I'm late.......
Said the white rabbit.....Ok perhaps I'm not too late.
There are still fresh apricots in the market and I hope you will be able to find some to make this incredible pudding.


I have been making this apricot pudding for a little while now since I discovered the recipe this summer in a local Italian magazine called, "Sale & Pepe" (Salt and Pepper).
Then the apricots began to rain down and I haven't stopped making it yet.
To me apricots are such an under appreciated fruit.
They're soft and luscious with a tartness that cuts through their sometimes mushy mash that delights and surprises the taste buds alone or with the other usual suspects, like deep rich chocolate  or buttery crisp pastry with a good measure of almonds, just to name a few.
However I digress.
Trust me try this pudding while the apricots last and if you miss them this year, make sure you book mark this recipe to try later.


Budino di Albicocche e Amaretti
Apricot and Amaretti Pudding
6 servings:
500 g apricots, fresh
120 g sugar (10 T)
3 ½ oz / 100 g (1 dl) white wine
1 stick of cinnamon
1 vanilla bean
4 eggs
5 amaretti cookies, crushed into fine crumbs

Wash the apricots and remove the pits.
Place the apricots, 40 g sugar(3 heaping T), white wine, sugar and cinnamon stick, and vanilla bean in a small sauce pan and cook on moderate heat for 30 minutes.
While the fruit is cooking, make the caramel.
Remove from the heat and remove the cinnamon and the vanilla bean.
Blend the fruit with the liquid till al is smooth and homogenous.
In a bowl whisk the eggs, add 80 g (the rest of the sugar) sugar, fruit sauce and amaretti crumbs.
Blend till well mixed.

Caramel;
100 g (½ c) sugar
15 g (1 T) water

In a smooth heavy bottomed sauce pan add the sugar and water.
Turn on the heat, cover with a lid.
Don't get distracted or walk away or most likely you will have burnt caramel.
Watch the pot till the sugar dissolves without stirring it and only slowly shake the pot if need to make the sugar smooth out.
Once the liquid begins to turn a golden caramel color and the desired color is achieved remove from the heat.
Slowly pour the caramel into the bottom of a small smooth bottomed tube pan, tilting the pan so the caramel goes slightly up the sides and center tube. Set aside till filling later.

Pour the fruit egg mixture into the tube pan with the caramel on the bottom. Place the filled pan into a larger pan that you can fill partly up the sides of the tube pan to make a water bath.
Bake the pudding at 350*F / 180* C. for roughly 1 hour or till the pudding is well set.
Remove from the oven and hot water bath and cool till tepid.
Refrigerate the pudding in the refrigerator for at least 2 hours or over night if you like, before serving.
To serve, remove the pan from the refrigerator. Run a palette knife around the edges of the pudding to loosen. Sometimes it also helps to run the bottom of the pan over a warm surface or flame to loosen the caramel.
Place a plate over the top of the pudding pan and gently flip it over.
Tap gently if the pudding needs to be nudged to drop to the plate.

Slice and serve with whipped cream with a drizzle of the caramel from the pan. 

I can hear you smacking your lips now. 
Ciaooooooo!


05 February 2015

Croissants with Nutella Recipe - Celebrating World Nutella Day 2015

It was a perfect snowy day here to indulge with my  Nutella filled Croissants
I haven't made real croissants in ages as I usually make a fast and yummy yogurt crescent that suits me just fine. However I have been wanting to test out a new stone ground flour that I am not able to buy locally on a variety of breads and pastry so I know how it turns out. It is not a white white flour and it is somewhat gritty, so it is important to know how it acts when making a variety of breads or pastries before I serve it to guests. I already learned that it is quite fragile when making thin crust pizzas for the wood oven, so I am still tweaking on that recipe. I found that this flour makes a beautiful croissant, full of flavor and an enchanting golden color. I used my natural wild yeast, sometimes called  sour dough,  that gave the finished product just a nice tang that cut through the butteriness. What's not to love?
My batch of croissants 
I won't kid you, it does take a bit of time to make these, and they are a bit fiddly, but the flavor and satisfaction are worth the effort. I feel the same about puff pasty and danish, which are the same process of building up layers of flour and butter through rolling out and folding, letting the dough rest in the cold and knowing just the right timing for the best results that it might be a tad daunting. However, I think you will find once you get the hang of it all they are a delight to make and even nicer to share with the ones you love or maybe someone you want to impress.
Tea for three
Roll em up


World Nutella Day is an event created by Sara Rosso of Ms Adventures in Italy and Michelle Fabio of Bleeding Espresso, just for fun and for the love of this Italian national chocolate hazelnut treat. They put this event together a few years ago and then it disappeared for a few years whilst the owners of the Nutella company figured out how to join in the fun. So this year it's back and here's my offering for a great way to enjoy Nutella, slathered generously on a freshly baked croissant. I did make mine from scratch over a 3 day period. You of course can do the same or you can buy some and bring them home to enjoy at your leisure, naturally.

Wild Yeast Croissants filled with Nutella
If you are interested in making them, I used Jeffery Hamelman's Classic Croissants recipe that uses American measurements and you will find that recipe here. If you prefer your measurements in metric, as I do now, you can find the metric variation of that recipe here.
Both recipes are clearly explained and beautifully illustrated with photos to make your project come together easily.
I hope you enjoy making them as much as I did and hope you have a wonderful World Nutella Day every day.
Fabrizio enjoying one for the camera

06 August 2014

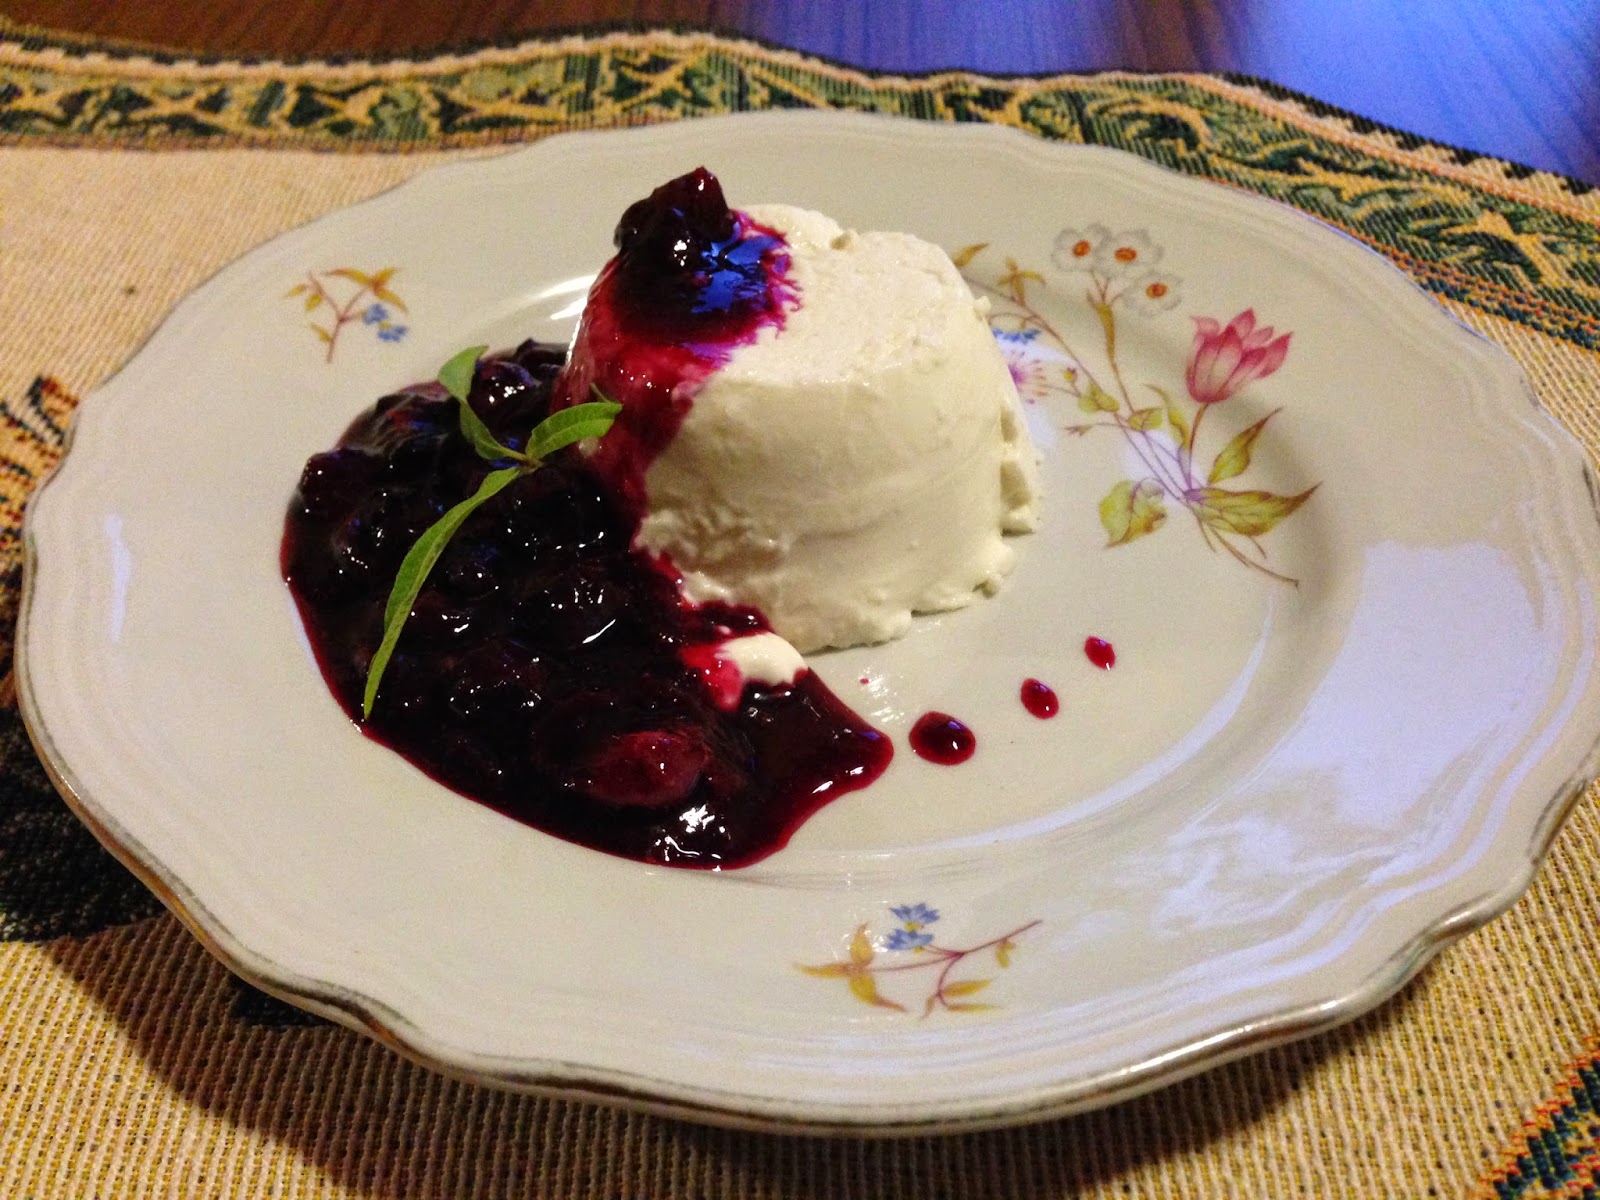
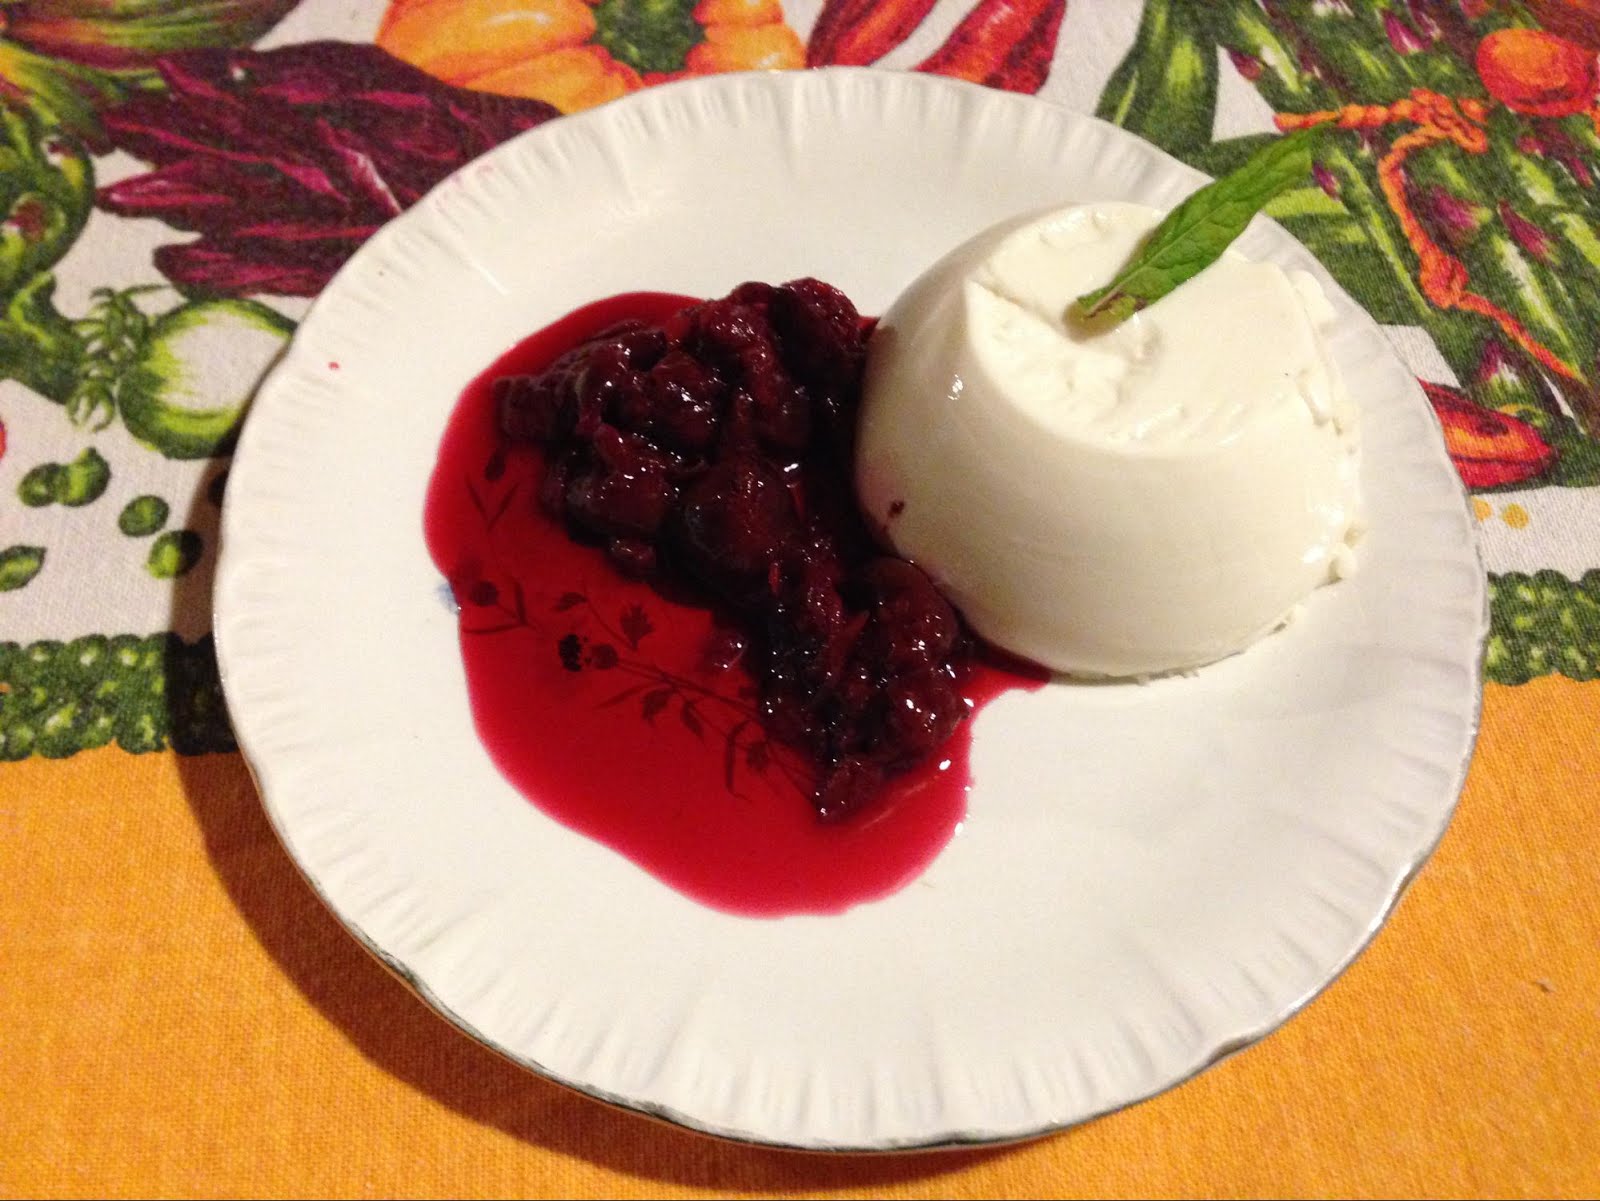
Lemon Verbena Panna Cotta, a Piemontese Treat


What a funny summer we have had here in the Alps. I don't know about you, but I am just a tad disappointed in the lack of hot glistening days so far this summer. However, there is one Italian dessert that I am certain will lift your spirits or top off a perfect hot summer day and that would be the crown jewel of Piemontese desserts that is panna cotta. This simple ending to a meal is perfection on a plate. It's light and yet indulgent. The name "panna cotta" literally translates as "cooked cream". Piedmont, one of Italy's northern regions in which I live, and that borders France, is famous for it's dairy rich cuisine and oftentimes overlap of  French culinary influence. Piedmont was once the kingdom of Savoy, whose royal house spawned many a tradition both culinary and culturally that have passed down through the ages and households of its loyal subjects.  This dessert will win your heart with its simplicity, versatility and easy preparation.  

Poued into cups before they have been refrigerated
The most traditional way of eating this dessert is just plain relying on the goodness and quality of the cream, however it certainly lends itself to many variations of sauces to accompany it or various liqueurs, or herbal infusions that if done with a light hand, adds layers of intrigue. 
I love this version of infusing the cream with a small amount of fresh lemon verbena leaves for the summer as a lighter version from my winter version that utilizes my homemade walnut liqueur called nocino. Both are winners and only a stoping off point to vary this lucious creamy dessert that you can whip up in the morning and enjoy for dinner that evening or the next. I have noticed that a few restaurants are starting to serve their panna cotta in a clear glass jar that insures that they don't have to worry about the dessert setting up on time or being anxious that the delightful little wiggle that a well made panna cotta has when turned out onto your plate and carried to the table, that insures a few oohs and aahs from your adoring dinner guests.  
I have added a subtle amount of lemon verbena and so you may find you want to add more or less, as it could depend on how large your leaves are or whether or not they are fresh or dried. When infusing the cream, just make sure to taste your cream a while after it has sat in order to insure you have as much flavor as you want. If not strong enough, add more crushed leaves and reheat if it has cooled took much. It's up to you.
Colle di pesce geletin and lemon verbena leaves

Lemon Verbena Panna Cotta

with a Blueberry Compote

6 servings
Ingredients:
  • 2 long gelatin sheets, long sheets or 4 short sheets (place in bowl of cold water)
  • 400 g of heavy cream (2 cups)
  • 120 g whole milk (½ cup)
  • 70 g sugar (6 T vanilla sugar is nice)
  • 8 or so lemon verbena leaves, fresh (approximately 2 T  or so)

    Method
  1. In a saucepan add heavy cream and milk along with the lemon verbena leaves
  2. Heat till it is hot to the touch and turn off heat and let the milk cream mixture infuse with the lemon verbena for about 1/2 hour. Test the mixture after about 10 minutes to see how the flavor is coming along and perhaps adjust by adding a few leaves if needed. 
  3. Place your gelatin sheets in cold water to soften while your cream mix infuses. 
  4. Strain out the leaves once your cream is flavored to a good strength but not too strong. Remove leaves earlier if you think it is getting to strong for your taste. I prefer a more subtle flavor but still to be strong enough to know it is there. 
  5. Once the mixture has cooled some and flavor has developed, I usually strain the leaves out into a bowl and clean out the bottom of the pan to make sure it won't stick when warming up the cream and sugar.
  6. Sprinkle the sugar over the bottom of the pan and pour the infused milk and cream mixture back into the pan.
  7. Gently squeeze the sheets of gelatin dry and add sheets to the cream mixture.

  8. Stir until sheet of gelatin has dissolved, reheating if necessary to dissolve the gelatin if the cream has cooled too much..Pour into cups and let set at room temperature until cool to touch. Refrigerate  or several hours until gelain has set and ready to serve.  (at least a couple of hours or overnight is good)
Suggestions: Any liquor or flavoring(vanilla, amend extract, Amaretto, Frangelico, Gran Marnier, Nocino, you get the idea) may be substituted for variety or taste preference.

Blueberry or other berry Compote

2 c.  fresh blueberries (200g)
4-5 T sugar (50 - 70 g) (can a bit more or less depending how sweet you want it to be)

Combine berries and sugar in a sauce pan and cook gently till the berries pop and make a soft creamy  compote for the panna cotta.

To Serve:
Unmold the pannacotta by running a small blunt knife around the edge of the cup.  Place a plate over the panna cotta and flip over. Tap gently on the bottom of the cups. (I have used plastic yogurt cups before and they have a little give when you are tapping that helps) The panna cotta should come right out. If not you can let gravity help you or place your plans over as the heat of your hands will help encourage the panna cotta to come out. Spoon your room temperature berries on the plate by the panna cotta.
Panna cotta with fresh cherry compote

21 April 2013

Gianduia Cheesecake, a Springtime Delight

Remodeling and gardening projects around our house
Springtime is here, but it seems to have taken it's good sweet time about it this year. It's been unseasonable cold for awhile. Now the weather seems to frolic back and forth between warmth and bursting into blossoms and greenery and a shivering standing on one foot waiting for the warmth to return.  One minute we are rushing to the garden to lay out  new beds and the next rushing back indoors to keep moving on the remodeling of the downstairs space. It is a never ending dance around the building and property as times and circumstances change and we change along with the circumstances and times. Fabrizio has been steadily working on a giant remodel of our family garden trying to keep our neighborhood cinghale (wild boar) and Olympic leaping food crazed caprioli (small roe deer) from having their way with our much missed vegetable patch. When the rain suspends that action he then makes his way through the myriad projects of remodeling our building that houses our B&B and cooking classes that has been in great need of attention. It is never a dull minute. I am banished to keeping the grub going to keep him and our various helpers fueled up to keep the projects moving.  We're making progress and hopefully the weather will pass into a distant memory soon as the guests arrive and the season of visitors gets fully underway. 
In the meantime one of my ways to keep up our spirits is to keep making treats to keep everyone sweet. 
This light and simple northern Italian style cheesecake features the blessed union of chocolate and hazelnuts that Piedmont is so famous for. Hazelnuts are plentiful here, but if you find them difficult to source, this recipe would work well with almonds as well. I love dark chocolate and think it adds the punch that is needed, but of course you can use milk chocolate if you prefer. Whatever changes you make to make this dessert your own, it won't matter, because I think you will find you'll want to make this dessert over and over. Just ask your taste testers, I'm sure they will oblige.


Gianduia cheesecake

Gianduia/Gianduja Cheesecake 

Servings 8 generous

Ingredients:


50g/ 2 oz/1/4 c  butter
150g /1 c  dry cookies, your choice, graham, ginger, petit buerre, vanilla wafers, 
1 T / 12 g  brown sugar

200g /  7oz / 1 c  hazelnuts, whole or pieces. toasted

200-300g / 10 oz  chocolate bittersweet I like mine a bit more chocolatey
30ml rum, brandy, hazelnut or chocolate liquor I used a 1 T brandy and 2 T Hazelnut

250g / 8-9 oz mascarpone cheese
200g / 7-8oz  heavy cream for filling a little more to whip for garnish. 

Method:

Toast the hazelnuts lightly in the oven or on top of the stove in a cast iron pan in a single layer till the nuts are lightly golden and fragrant. If using the on top of the stove method. make sure to shake the pan frequently and don't wander off as the nuts can burn more easily and you need to pay attention to them.

Set aside to cool. When cool, either chop fine with a knife or pulse them in a food processor till they are fine but not a paste. Do make sure they are completely cooled so that when you chop them up they don't turn into a paste. Divide the nuts into two portions. Set aside.

Melt the butter. Crush the cookies into coarse crumbs. Mix the melted butter with the dry cookies crumbs.
Presse the mixture into the bottom and slightly up the sides of a buttered 25cm or 10" pan with removable collar.  Chill the pan with the crumbs while preparing the other ingredients. 

Place the chocolate in a double boiler with the heavy cream and heat with out stirring, until the chocolate is melted. while still warm, gently whisk the cream and chocolate together, add the brandy or other alcohol and mix until smooth. Add half of the chopped hazelnuts to the chocolate mixture.
Cool until the mixture is no longer hot to the touch.  Whisk in the mascarpone cheese lightly until all is mixed and smooth, but no more than necessary to mix. Taste and add a little more alcohol if desired. Pour the mixture into the chilled crumb crust and smooth flat. Sprinkle the top with the other half of the crushed hazelnuts covering as much as possible. Chill for at least 3 hours and over night is even better. 
To serve, remove from pan and place on platter. Garnish the top with 8 rosettes of whipped cream and sprinkle chocolate shavings on the cream. I served mine for Easter, so I used small chocolate Easter eggs as garnish.  You could serve with a chocolate, fruit or carmel sauce if desired. 


Easter table with Gianduia cheesecake primroses and Easter eggs in hankies 

05 February 2013

World Nutella Day 2013 - Nutella Frolla Bites

Way Hey, It's World Nutella Day

Mini muffin type  sweet pastry cups,  filled with Nutella goodness inside
What can I say? I live in the Italian province of Piedmont, where Nutella was born, so I can not resist joining the World Nutella Day celebrations that started a few years back. This event was conceived and spearheaded by Sara Rosso, who writes the Ms Adventures in Italy blog, amongst all the many other hats she wears and Michelle Fabio who too wears many hats of which the blog Bleeding Espresso  is one of her creations. You can learn more about World Nutella Day here.  I have a few recipe offerings from past  years that you might want to check out after you try this one.I'll put some links at the botton of the post. I have to say that we are all rather taken with this one and think it will make it into the rotation a little more frequently that maybe it should. It's basically a cookie cup filled with Nutella creaminess. They keep well in a cookie tin and served with a little caramel or chocolate sauce, they can double as an easy dessert in a pinch. I find it a delight alongside an afternoon espresso. Mmm, Mmmmm. Give it a whirl and see what you think.
Two crusted pasta Frolla bites. I ran out of tops for the last one, but it tasted just fine.

Nutella Frolla Bites

Yields: 24 double crusted mini bites
Oven Temperature: 350*F / 180*C

Pasta Frolla dough:

2 c (280g) plain flour
1 tsp (4g) baking powder (about half a package that you find here in Italy)
1/2 c (100g) sugar
Zest of 1 orange or lemon, I like to use a rasp micorplane, just try not to get any of the white pith
Pinch salt
4 ounces (110g) unsalted butter, chilled but not straight out of the refrigerator, cut into small pieces

1 large egg
1 large egg yolk


Nutella Filling


Method:
Measure your flour into a largish bowl (Italians often make this directly on the wood work table)
Add the baking powder, salt, citrus zest, and sugar. Lightly stir to mix all. Drop the cold butter into the flour mixture. Either cut the butter into the mixture or use your fingers to rub the butter into the flour quickly to get small clumps and it starts to form a dough. Work quickly so the butter doesn't get too soft. Make a shallow well and add the whole egg and yolk. Mix in a circular motion until the dough begins to come together. Form in to a cohesive dough, Cover and refrigerate at least an hour. You can leave it overnight if you prefer.
Roll out the dough on a floured surface to about 1/4'/ 1cm thickness. 
Make the bases larger than the diameter of the mini muffin tin. I used a round cookie cutter to make the bases slightly larger bottoms than the tops if you have a couple of sizes. I couldn't find my set of cutters, so the tops were the same size as the bases and bigger than needed. Place the pastry disc into a greased and floured (or a no stick) mini muffin pan, or petit four cups. Press the dough in lightly. Place a small dollop of Nutella into the depression. Cover the filled bases. I either tucked the top into the depression of the filled base or pinch the dough around the edges. I didn't seal it and used a light touch. They seemed to self seal when baked. 
Bake the bites at 350*F / 180*C for about 15-20 minutes till they start to get some color, but be careful not to over bake.
Cool slightly before removing from the muffin tins, to cool completely.
Delicious warm or cold.
I think you'll find they disappear quickly.

Viva la Nutella!

Inside the folla bites
My other World  Nutella Day recipes:


28 January 2013

Fresh Orange Tart- adding a bit of sun to winter

Enrico,  our favorite citrus vendor
This winter the snow has been slow to arrive after a very early appearance around the 26 October when all was green and the leaves were still on the trees. Now that the white blanket of snow has covered up the unrelenting brown of the winter, it's time for a splash of color. My favorite winter remedy would be the luscious citrus fruits from the south of Italy. Our Sicilian citrus farmers send up some of the tastiest oranges, clementines, and mandarins found anywhere. I always look forward to late autumn when the road side trucks laden with oranges begin to reappear randomly and in regular pull off points where they beckon you to buy a case or two of sunshine and sweetness. Drawn to pull over and inspect the vendors goods, unable to resist the siren song of oranges, we come away with a case of oranges and mandarins. Orange indulgences to follow. We've peeled and juiced these globes of desire until I finally begin to use them up in other ways that requires a tad more effort. 
Tarocco or "Tarot" oranges which are called red oranges here never called blood oranges
I made this orange tart to try and replicate it after having enjoyed a fabulous slice at Caffe' Roma, which is one of our favorite bars in Pinerolo,  The cafe is located at the corner of Piazza Roma, where the daily Farmers market usually draws us in on our market visits. Caffe'Roma is owned and run by 3 brothers, of which 2 work in the  bar and one brother, Francesco, runs the kitchen. I frequently run into the chef shopping at this market and that always puts a smile on my face. I actually see a number of local restauranteurs shopping here and that is so encouraging. Caffe' Roma is a popular lunch time choice, as they serve deliciously genuine and reasonably priced food. You can choose to dine inside or al fresco at one of the curbside tables. I love Franceso's orange tart as it is not one that I have made or enjoyed much before coming to live in Italy. His selection of desserts are always enticing. He has shared his talent, teaching workshops at the restaurant, and at Frossasco's Mueso del Gusto. Unfortunately, I have not been able to attend, so I am left to my own resources. My recipe for this tart is pretty simple as he told it should be. Perhaps not the perfection that I found in his balance of flavor and technique, but tasty and worth making when you want to bring a little sunshine into your day.
Crostat di Arance---Fresh Orange Tart

Fresh Orange Tart or Crostata di Arance

Yields: 1-10 inch or 1-25 cm  crust
Oven Temp 200*C /375*F to blind bake the crust then later to 190*C / 350*F

Pasta Frolla

Ingredients:

200g flour, plain flour or Italian 00 (1 1/2 c / 7 oz flour**) 
125g butter, chilled, but not soft or too hard (1/2c / 4.4 oz)
75 g sugar, granulated or castor (6 T / 2.6 oz)
2 egg yolks

Add sugar to the flour and mix.
Cut the butter into smallish pieces and rub the butter into the flour with your fingers.
Make a well in the middle of the dough.
Add the egg yolks, and stir or mix well with your hands till it comes together in a soft dough.
Knead lightly and briefly to get a smooth dough, being careful not to work the dough too much
Refrigerate for at least 15 minutes, as it makes it easier to handle.
Roll out on floured surface or between lightly floured parchment paper for ease.
**Cooks notes: I have found the dough might require more flour as weight to volume flour conversions can vary greatly. Add a little flour at a time if you think the dough is too sticky to get it to be a manageable dough and if necessary, be generous with the flour when rolling the dough out.

For the filling:

Orange peel (organic is best) 
1/2 c sugar 
1/2 c  water
500g oranges slices, peeled  (a little over a pound of oranges, after peeled, maybe 4)
Apricot preserves or Orange marmalade,  a goodly amount as needed for covering the crust and glazing the top,
Brandy or rum

Directions:

Mix up the pasta frolla and refrigerate.
While waiting for the dough to chill, prepare your filling.
Wash the whole oranges and wipe dry.
Before removing the peel from the orange, I either zest or use a channel knife to remove the orange peel zest or strips before actually removing it from the orange itself. 
If you hve neither tool, remove the peel form the oranges, making sure to remove the white pith from the orange. If the white pith is too plentiful scrape some off with a small paring knife. 
Julienne (cutting the peel into thin slivers) the peel.
 In a small sauce pan add the water and sugar and heat to boil. 
When the sugar is dissolved add some or all of the peel. You might need to increase the amount of equal parts of sugar/ water if you have a lot of peels. 
Simmer the peels in the sugar water till softened and translucent. Remove from the syrup and lay flat on a plate or waxed paper when cooled to dry slightly. 
Set aside.

Slice your peeled oranges into rounds and set aside also.
Roll your pastry out to fit a 10" or 25 cm removable bottom tart tin.
Place your pasta frolla in the pan and trim as needed.
Prick the bottom of the pastry generously with a fork.
Line the pastry with baking paper and weigh down with beans or another pan that fits inside. 
Blind bake at 200* C / 375*F for about 20-25 minutes, removing the pan partway though the baking so the middle bakes more thoroughly. With beans or weights, i would bake with them on top the whole time. 
Cool slightly.

Mix your preferred preserves with a few drop of brandy or rum to thin slightly. Warm up on the stove top to make it easier to spread. 
Cover the bottom with a thinnish layer of preserves. I used marmalade as I have quite a bit on hand that I make. 
Now cover the bottom with your jam and crust with the orange slices in a decorative circle, slightly overlapping the edges, till all is covered.
Lower the temperature of your oven to 190*C/350*F
Bake an additional 10 to 15 minutes to cook through. 
Thin more marmalade with liquor to make a thin glaze and light glaze the whole tart while warm. Let cool at least 15 minutes before trying to cut it. It will be hard to resist the urge to devour it right out of the oven, but do wait or the crust will crumble. 
Great served at room temperature and is just as tasty the next day or so. 

Let the sun shine through!


03 February 2012

Baked Pears in Red Wine Sauce


Finally winter has arrived complete with sugar frosted trees, a blanket of snow and temperatures low enough to keep you running to stoke the fire. My mind continues to turn to foods that bring comfort on these winter days. Although February has arrived with long anticipated snow and the days are somewhat longer and lighter, comfort dishes still beckon like a siren calling you to crash on the shore.  
Pears figure in often during these comfort seeking days. I'm a huge fan of poaching pears as well as pear cakes and tarts, but I must say that the simplicity of oven baked in red wine till glisteningly caramelized with a luscious gorgeous thick wine sauce underneath that you might find you will want to make a bit more as it is just that tasty. It's a wonderful drizzling sauce to go over ice cream, plain yogurt with bananas or just about anything that strikes your fancy. 


Caramelized Pears in Red Wine sauce
Pere Caramellate in salsa al vino rosso


Serves 6 
easily doubled


Ingredients:
6  Pears, firm variety like Kaiser or Williams,  medium sized, if organic you won't need to peel them
100g (1/2 c) sugar, I like to use a granulated organic raw cane sugar, but regular white is fine
350g (1 1/2c) red wine, I use a barbera or dolcetto table wine. It does't need to be an expensive wine


Method:

  • Wash and pat dry. If you prefer you can peel them, but I found them deliciously rustic with the skins on, although you will get more color contrast when peeled. which may be n ice for serving guests.
  • Trim the bottom of the pears so they will sit up straight, peel, if desired.
  • You might want to use a ceramic baking dish that you can bring to the table. Lightly butter or oil. I used a metal rectangular pan, lined with baking paper and stood the pears upright. 
  • Pour the wine over all the surfaces of the pears.
  • Sprinkle the sugar over the pears so that the sugar sticks to the tops and sides of the pears. **
  • Bake in a preheated oven 400* oven. I have a convection oven and bake at 180*-190*C (350*F) for about 45 minutes. If you have the time you can baste the pears with the sauce every 15 minutes for a deeper color. 
  • The pears should be soft and the wine sauce thicken and deep rich color. 
**Optional spices if you like, but they are quite nice as is.
Do use a simple combination of spices, as too many will over complicate it.
I prefer them without the spices for the pure clean flavor.
Use whole spices so they are easily seen and fished out.
Some suggestions
**A few citrus peels, a few pink or black peppercorns, 6 juniper berries, a stick of cinnamon, broken in two, 2 whole cloves, 4 whole allspice, 2 star anise, a few peeled ginger slices.  

06 January 2012

Benvenuta "La Befana" with Lavender Limoncello Stars

Were you naughty or nice? Coal or treats that is the question come the 6th of January in Italy. You just need to see what was left in your stocking to come to some sort of conclusion. I have written a number of posts over the years about the Italian tradition of La Befana, so I thought I might put up some links to blog posts past. Befana is an interesting mixture of what to me seems like Halloween and Christmas. Befana is a kindly old woman or witch on a broomstick who flies everywhere on the night before Epiphany or 12th night as it is also called, and either fills up your stockings, that should have been hung by the chimney with care, with treats or small presents, or you get a lump of coal. Fortunately, for Italian children, the lumps of coal have been transformed into black confections that make for a more more pleasant time taking your lumps of coal in stride.


Here are a few links to previous posts I've posted over the years. some have more of the story of La Befana's origins and others are recipes for dishes designed to serve on a Befana menu.
Martha over at Go Italy has a great post on the origins of la Befana, that you might enjoy reading.
I also made some cookies this year called La Befana Stars. This version is a departure from the usual anise flavored variety and met with an appreciative round of approval. Unfortunately, I forgot to get a photo of them before they were all given away and eaten right up. Any size star cookie vutter will do. You can make a milk glaze and add sprinkles or just give them a dusting of powdered sugar. This was a great way to use some of my home made limoncello and abundance of lavender from our garden.

Head over to  "The Leftover Queen" to check out Jen's version of the La Befana traditional recipe for what are usually anise flavored cut out star cookies. You'll find the recipe in it's entirety. 

08 April 2010

Anise Orange Biscotti


I always try to have a stash of cookies lurking in my assorted cookie tins for that unexpected drop in visitor that makes it seem that we were just waiting for them to visit. Home made cookies always seem to delight everyone, elevating the shared drink from pleasant to memorable.  I often have friends asking me to bring those cookies around again that they had at our house or that I brought round for Christmas, you remember them don't you? Oftentimes I don't as I like to cycle through a variety of cookies and by the time someone is reminding me about them, I am on to the next round of new favorites, or wading through some of the old favorites scribble on the various scraps of paper tucked in to my various notebooks. These anise orange cantucci, if you will, is still one, my neighbors, ask for longingly. Cantucci is what the twice baked cookies that we generically call biscotti in America, are actually called in Italy. They are most well known in Tuscany as basic almond variety that are usually served with  a sweet vin santo (blessed wine) at the end of a meal, for a light ending to a meal. Biscotti to Italians, just means what American s call cookies and the Brits call biscuits. I just call them delicious and think you will as well.

These biscotti are just the right sweet fix you might want to  indulge in after all the Easter excess of chocolate bunnies and eggs.  Simple and satisfying, cut into tiny dippers for your espresso or large batons suitable for dunking in your caffe latte or milky tea and you will probably find they are so irresistible you might need to hide the cookie tin somewhere to make it difficult to polish off the whole batch at one sitting. Flavorful and yet, not too sweet or rich that dunking them into your favorite hot beverage will have you heating up the kettle at all hours of the day and night just to dunk these delicately flavored numbers again and again. I don't go over board on the the anise flavor as I prefer a more subtle note that leaves you tasting the various flavors and not hidden by just one. Do feel free to add more to suit your taste if you will. If you remember to form them into 4 narrow logs instead of two fat ones, you will be rewarded with small bites that fit well in an espresso cup or a platter of various other bites. You could also dip one half in white or dark melted chocolate to up the decadence, but I preferred to have them as their humble self, suitable even for breakfast in the traditional Italian way. What ever way you prefer, I think you'll be adding this to your treasure trove of cookie recipes.

Anise Orange Biscotti
yields about 48  or so small bite size
or about 30 large batons

Ingredients:

150g (2/3c) butter, room temperature
325g (1 1/2c) sugar, I used a blond cane sugar, but regular sugar is fine
3 eggs
5g (2 tsp) anise seeds
2 tsp anise extract
12g (2 T) orange zest
pinch salt 
11g (3 tsp) baking powder
630g-650g (4 1/2c) flour, plain/all purpose


Method:
Cream butter and sugar together in a medium large mixing bowl.
I use a flat whisk by hand but an electric mixer is fine. Just don't mix too long.
You want it light, but not whipped like a frosting.
Add the eggs and blend well.
Add the anise seeds, orange zest, anise extract, pinch salt and blend.
Add the flour and baking powder.
Stir to form a dough.
Dust your table surface with flour.
Turn the dough onto the table.
Dust your hands with flour and divide dough into 2 or 4 even portions.
Form the portions into long even logs the length of your baking dish.
You can either lightly butter and flour a baking sheet or use baking paper to cover the tray.
Place two logs on each tray.
Pat them to be fairly smooth on top and even widths.
Make another tray the same way so you have two trays and 4 logs.
Bake the logs in a preheated moderate oven 325*  for 20 minutes or so until the logs are a light golden brown.
Remove from the oven and cool slightly. If you press the top middle log and it seems not cooked all the way through, return then to the oven and continue to cook till completely cooked all the way through.
Remove and cool slightly to be able to handle.
With a serrated knife cut each log on a 45* angle into 1/2" slices. The more angle the longer the finished cookie will be.
When you have them all cut, turn the slices on their side and return to the oven to bake a second time to bake completely through and light golden brown.
Cool before storing or dipping in melted tempered chocolate if desired.

Cooks notes*
Do cut the biscotti while they are warm for the best results. Too cool and they will crumble when you try and cut them if over baked.
Better to under bake the biscotti slightly the first time baking them, so they are easier to cut.
Too under cooked and the center of the cookie will be hard when you bake them the second time.
Still delious, but not ideal.

14 February 2010

Have a Chocolate Heart today!

Happy Valentine's Day to all of you out there.
It's a day to enjoy chocolate as far as I'm concerned and that can't be bad. I must say that I started with a piece of toast this morning with a slathering of Nutella on just to kick the day of on a celebratory note. I made this cookie a ways back, but love the photo so I decided to trot it out, but alas when I tried to open my recipe in my files, it keeps telling me it is either corrupt or isn't supported. Computers are so great when they work. Unfortunately, I can't find a hard copy of it any where in my miles of recipe files and scraps of scribbled stacks of recipes and ideas anywhere, so I'll just give you an Alice Medrich recipe that I based my recipe on. I had the great pleasure of taking a cooking class from her years ago down in Boulder, when I was still up in the high country of Colorado. She was a delightful teacher and it was great to not only sample all of her chocolate decadence, but to listen to her stories and see her in action. OK, yes these are not traditional Italian cookies, but they are very tasty.  I used a cookie press to make the star on each of the cookies before popping them into the oven.

Mexican Chocolate Cookies

Recipe courtesy of Alice Medrich 

  • Prep Time: 1 hr 30 min
  • Yield:  40 to 45 cookies

  • Times: Prep1 hr 30 min 

    Inactive Prep--Cook--Total:1 hr 30 min

Ingredients

  • 1 cup all purpose flour
  • 1/2 cup plus 1 tablespoon unsweetened Dutch Process cocoa powder
  • 1/4 teaspoon baking soda
  • 1/4 teaspoon salt
  • 1/2 cup plus 1 tablespoon brown sugar
  • 1/2 cup plus 1 tablespoons granulated sugar
  • 3 tablespoons sweet butter, slightly softened
  • 3 tablespoons stick margarine, I used all butter, which will make them crispier
  • 1/2 teaspoon ground cinnamon
  • Generous pinch of ground black pepper (I was very generous with both peppers)
  • Generous pinch of cayenne pepper
  • 1 teaspoon vanilla
  • 1 egg white

Directions

Combine the flour, cocoa, soda, and salt in a medium bowl. Mix thoroughly with a whisk. Set aside. Combine the sugars in a small bowl and mix well with fingers pressing out any lumps. (Process in a food processor if lumps are stubborn).
In a medium mixing bowl, beat butter and margarine until creamy. Add sugar mixture, cinnamon, peppers, and vanilla. Beat on high speed for about one minute. Beat in egg white. Stop the mixer. Add the flour mixture. Beat on low speed just until incorporated. Gather the dough together with your hands and form it into a neat 9 to 10-inch log. Wrap in waxed paper. Fold or twist ends of paper without pinching or flatting the log. Chill at least 45 minutes, or until needed.
Place oven racks in the upper and lower third of the oven preheat to 350 degrees. Line cookie sheet with parchment paper or aluminum foil.
Use a sharp knife to slice rounds of chilled dough a scant 1/4-inch thick. 
Place 1-inch apart on prepared baking sheets. 
Bake 12 to 14 minutes. Rotate baking sheets from top to bottom and front to back about halfway through. Cookies will puff and crackle on top, and then begin to settle down slightly when done. Use a metal spatula to transfer cookies to a wire rack to cool. Allow cookies to cool completely before storing or stacking. Store in an airtight container up to two weeks, or freeze up to 2 months. 


Here are a couple of pictures of us on Valentine's Day in years past.
 
We were awarded gold medals by our Dutch guests after returning from one of their many nights of attending the Speed Skating competition in Torino in 2006. They had friends competing and well you know how the whole of Holland is just mad about skating! 


Valentine's Day, 2007 
 
We took a lot of people by surprise when we went skiing on a powder day to Loveland ski area and got married along with 60 other couples, some who were renewing their vows, in what was a very cold and yet very emotional ceremony on top of Loveland Pass, Colorado. We celebrate 9 years together this May, but just got around to officially getting married 3 years ago.
Who knows what lies in store for future Valentine's days. I'm sure it will be fun. Today we're just taking it low key and happy to be healthy and together. Can't ask for much more. 
Happy Valentines Day 2010!
Bookmark and Share